With the continual advancement in technology and our need for electric gadgets, you may want to keep your notes digital. You can use Google Keep for that. best thing about this, It’s free yet wonderful.
If you haven’t come across it and wondering “What is Google Keep?”, It’s a note-taking app, which allows you to take note with text or images. The one thing I love about Google Keep is its Share & Synchronize features.
I am a super fan of checklists, I made them for almost everything which I update with time. I use Google Keep to take some of my notes, but I prefer Pen & Paper more when it comes to List for planning & getting organized.
Why Google Keep ?
There are so many apps and organizing tools to take notes & organize. I had tried some but stopped after Google Keep, there was no need to look any further.
Three main reasons to choose Google Keep:
- Write and access every list in a single place (Text / Image).
- Set reminders for critical lists (Time or Location based).
- Access my Google Keep with Phone & Laptop, as a matter of fact with any linked device.
For absolute beginners, let me share with you how to set up, take organized notes and personalize your Google Keep. you can keep reading even to know how to use it effectively.
1. Set up Google Keep
Setting up Google is considerably easy, It will only take few minutes to get started. you can set-up your Google Keep following this guide then work around the customization.
Sign into your google Account
You will need to sign in to your Google account as Google Keep is a part of the Google Docs Editors suite, offered by Google. I assume you have one considering most people have Google accounts, but if you don’t, just SIGN UP and you’re ready to go.
Locate your Google Keep
You can Locate your Google Keep by searching it on google, Or can access it from 9 Dots in the Top-Right of your browser considering you’ve signed in to your Google account. Click 9 Dots and Scroll down to “Keep”
You have come this far, now is the fun part. I like to categorize the notes I take, it’s easier to access and work with.

You can access your Notes and Labels or reminders from three lines on the top left.
Create and Add Labels
Labels are like generalized List names, you basically bunch up a similar list in one place by assigning them the same label. You can either take notes after selecting the label or can always add it afterward.
To add a Label to any list, select that list and click on 3 dots at the bottom, add a label by typing a new one or just select from the existing One. You can see all the lists under a particular label by clicking on that label from the left side Menu bar.
For a starter, you can start with the below labels
- To-do List
- Shopping List
- Work
- Home
- Personal time
- Finance
Create List or Take Notes
Now is the time for you to organize your Thoughts by creating Lists. With google keep, you can take notes in different formats
- List or Checklist (with Checkboxes)
- drawing or Image.
- URL or links
I personally prefer a list with texts but, occasionally add images to my shopping lists when I need something specific and don’t want to fumble around for pics.
While Google Keep adds new items at the bottom by default (you can change it to the beginning of the list in settings) but allows you to add something in middle. all you have to do is take the cursor where you want to add & enter.

As I had told you earlier notes are more detailed & specific list for your Label. It’s like subcategories for the main one.
For Ex. I have a To-Do List label but there is no end to the task, everything you do is a task in a way. They can be time-critical or necessary tasks, so it makes sense to categorize them. I have labeled the below-listed titles as To-Do List:
- Daily Task
- Master To-Do List
- Books to read
- Movie to watch
You can have as many or as little you like. start with these lists work around making others as you go.
2. Personalize your Google Keep
there are so many ways to personalize your notes, you can Add Images in notes or Title, Use checkboxes for task lists, color code them by labels, set reminders for time-critical notes & Pin the most used one or important one at the top.
Add Checkboxes
Adding Checkboxes is easy, Hover over the list till you get the options, click on 3 dots “More” and select “Show Checkboxes” and done.
You can add checkboxes to your To-do List & Shopping List, striking the items checked gives a sense of accomplishment. Option to uncheck the checked items save time to rewrite the same thing, you don’t have to make a repeatedly used checklist more than once.
In Google Keep Checked items are moved to the bottom of the list as stricken items rather than deleted from the list. Isn’t it just convenient? you can delete the checked items from the list or uncheck them by navigating the options menu in the list.
Color code Labels
You can color-code your labels by assigning the same color to all the lists under same label. It’s the easiest way to identify your list’s functionality when you have too many lists in your Keep.
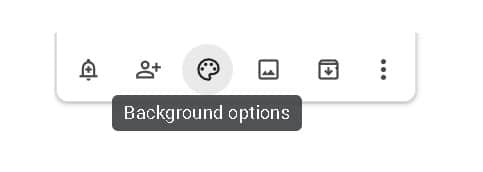
To add color to a note, just hover over the note till you get the options bar, select color by clicking on “Background option”.
Set Reminders
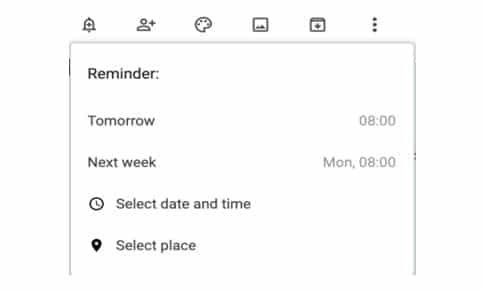
You can set reminders for the critical tasks, just click on the bell icon, and fill in your reminder preferences, that’s it just set it & forget it, Google keep will notify you at the selected time. (Remember to keep notification on)
Location-Based Reminders: I never find my shopping list empty, I don’t like to make a special visit for shopping, especially for grocery shopping. Location-Based Reminders make it easier for me. So whenever I pass by the store I receive a reminder for that list. this saves time & space in your mind!
Recurring Reminders: You can set recurring reminders for the to-do list that you repeat too often
If you want to see or edit your reminders, you can access them from the reminder tab on the left of your Google Keep in perfect order with reminder time.
Google Keep allows you to set default reminder times too, from the setting icon on the top right select setting and fill in your preferences.
Pin your List
With so many lists & notes, It’s difficult to find the one need, of course, the labeling method helps. but we can take one step further by pinning the most used notes on the top.
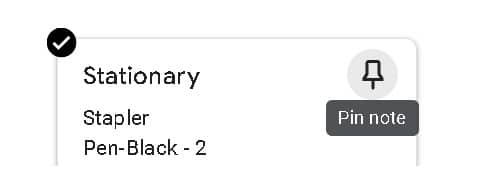
We all like to set our priorities then why not with our Lists? just pin your favored ones with the pin icon at the top right of your note. I Pin my To-do Lists. current project notes.
3. Share or collaborate your list
I find this feature very helpful while managing shopping, all I have to do is share my shopping lists (I have a few based on most frequented stores) with my husband.
Share your list by clicking on the collaborator tab from the option bar in your list. Fill in the details and save. Make sure that you have “Enable Share” checked in Setting.

4. Synchronize in multiple devices
For Android devices, Install Google Keep App from the Google Play store, Sign in to your Google account and you’re all set. Whenever you add or edit the notes from one device, it will be synchronized on all others devices provided they have Internet access & you have signed in to your Google account.
For Laptop, you can use it in a browser or Add the chrome extension, from settings click on App Downloads, and select Chrome Extension then “Add to Chrome”. Chrome Extension lets you save URLs too.
